
Need an easy birthday cake go to? This cast-iron chocolate chip cookie dough cake recipe never disappoints! Everything is better in cast iron!
Y’all…there’s a special kind of warmth that comes from celebrating birthdays at home—especially when dessert involves a cast iron skillet and a thick slice of chocolate chip cookie dough cake. Around here we don’t do a thin layer cookie cake! You know us better than that by now. It’s become a small tradition to bake this cast iron chocolate chip cookie dough cake for my daughter and husband’s birthdays in January and February. The combination of soft, chewy cookie dough and perfectly crisp edges makes it a favorite in our home.
This chocolate chip cookie dough cake is simple enough for a weeknight dessert but impressive enough to double as a birthday cake. Made with room temperature butter and a mix of brown sugar and granulated sugar, it has that irresistible balance of crispy edges and a gooey center….YUM! Whether you’re celebrating a birthday or just need a cozy dessert, this chocolate chip cookie dough cake recipe is sure to become a favorite!
See full recipe card for our Cast Iron Chocolate Chip Cookie Dough Cake Recipe at the bottom of the page with detailed ingredients list and full step-by-step instructions. Print to save in your cookbook binder or bookmark this page!
Why We Love This Chocolate Chip Cookie Dough Cake
Birthdays are a big deal in our home, but we do them on a tight budget! This cast iron chocolate chip cookie dough cake never disappoints. My daughter’s eyes light up when she sees this cookie cake coming out of the oven. That girl loves a good dessert!
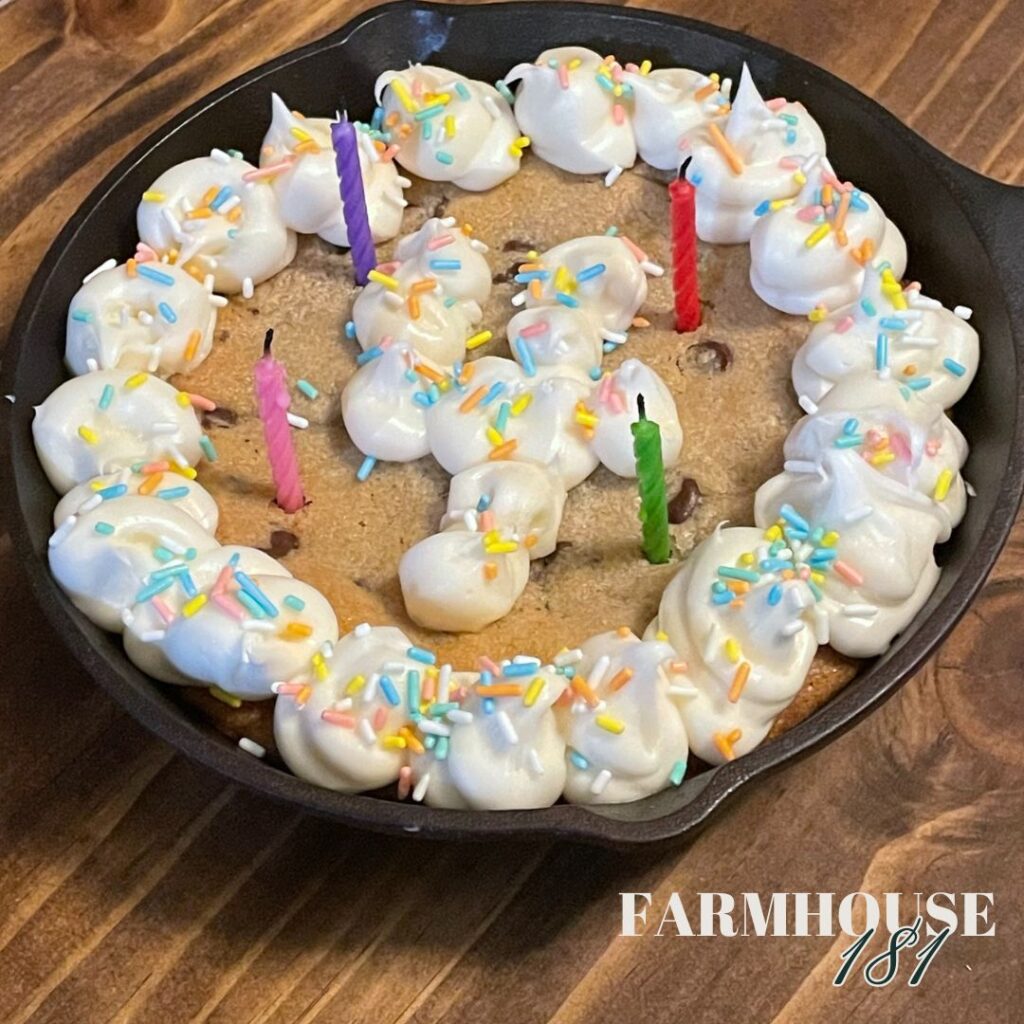
This chocolate chip cookie dough cake recipe is perfect because of it’s versatility! You can frost it with brown sugar buttercream and sprinkles to dress it up for a birthday or just serve with ice cream. Its even perfect by itself! The cast iron skillet gives it such a homestyle feel that is just right for a small, cozy family celebration.
Special Equipment Needed
- 8-inch cast iron skillet (well-seasoned)
- Electric hand mixer or stand mixer with paddle attachment (not necesary, but very helpful)
Why Baking in Cast Iron Makes a Difference
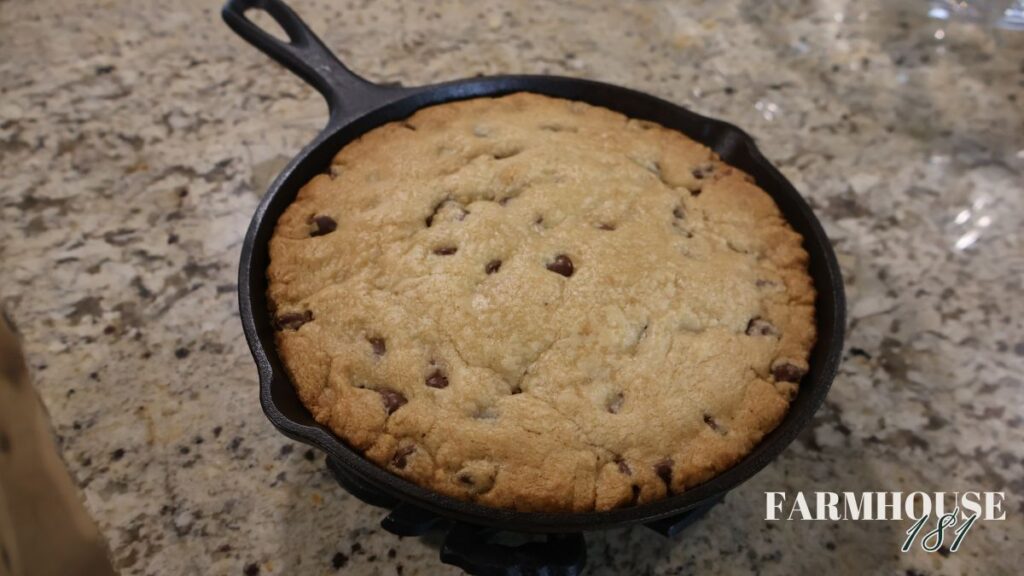
Baking this chocolate chip cookie dough cake in cast iron gives it that signature crisp edge and soft center. The even heat distribution helps the dough bake consistently ensures every bite is perfect.
The rustic presentation of serving a warm chocolate chip cookie dough cake straight from the skillet is an added bonus, making it feel both comforting and impressive for birthdays or special occasions.
Ingredients for Cast Iron Chocolate Chip Cookie Dough Cake Recipe
- 1⅓ cups unsalted butter, softened to room temperature
- 1 cup granulated sugar
- 1 cup dark or light brown sugar, packed
- 2 large eggs
- 2 teaspoons vanilla extract
- 3 cups all-purpose flour
- 1 teaspoon baking soda
- 1 teaspoon salt
- 12 ounces semi-sweet chocolate chips (or mini chocolate chips for more even distribution)
Substitutions and Variations
- Peanut Butter Cookie Dough Cake: Swap half of the chocolate chips for peanut butter chips.
- Salted Caramel Cookie Dough Cake: Drizzle salted caramel on top of the cake.
- Chocolate Chip Cookie Dough Sundae: Top with homemade vanilla ice cream, pecans and caramel.
How to Make Cast Iron Chocolate Chip Cookie Dough Cake Recipe
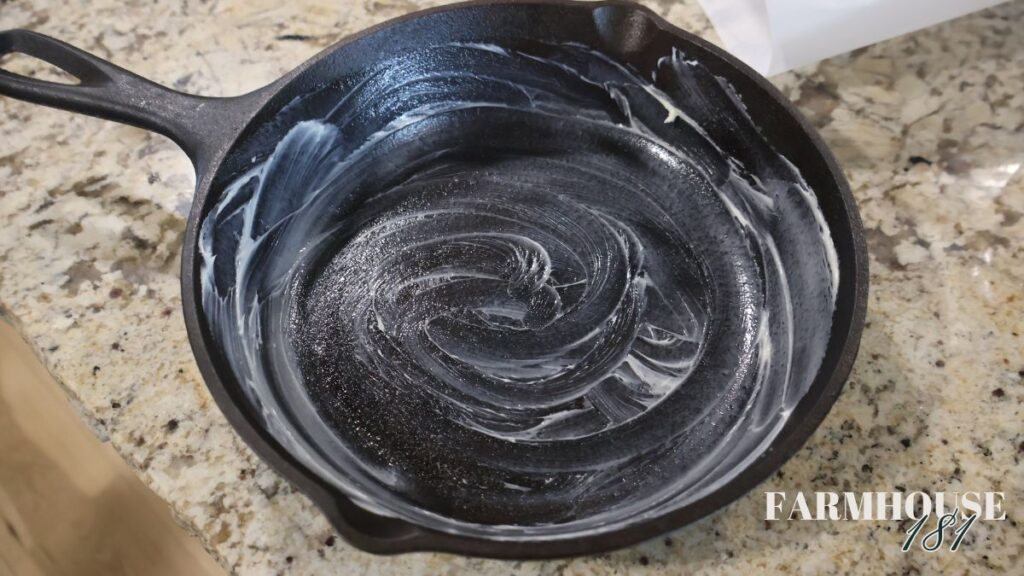
1. Preheat and Prepare the Skillet:
- Preheat your oven to 325°F (163°C).
- Grease your 8-inch cast iron skillet with softened butter to ensure the cookie dough cake doesn’t stick.
2. Cream the Sugars and Butter:
- Next, in a large mixing bowl use an electric mixer on medium speed to cream together the unsalted butter, granulated sugar, and dark brown sugar until light and fluffy.
- This step helps create that soft, chewy texture that makes this chocolate chip cookie dough cake so delicious.
3. Add Wet Ingredients:
- Mix in the large eggs one at a time, followed by the vanilla extract, ensuring each addition is fully incorporated.
- Use low speed to prevent overmixing.
- Make sure to scrape down sides of the bowl before adding dry ingredients.
4. Combine Dry Ingredients:
- In a separate bowl, whisk together the all-purpose flour, baking soda, and salt.
- Gradually add the flour mixture to the wet ingredients, mixing on low speed until just combined.
- Make sure to scrape down sides of the bowl to ensure all ingredients are combined.
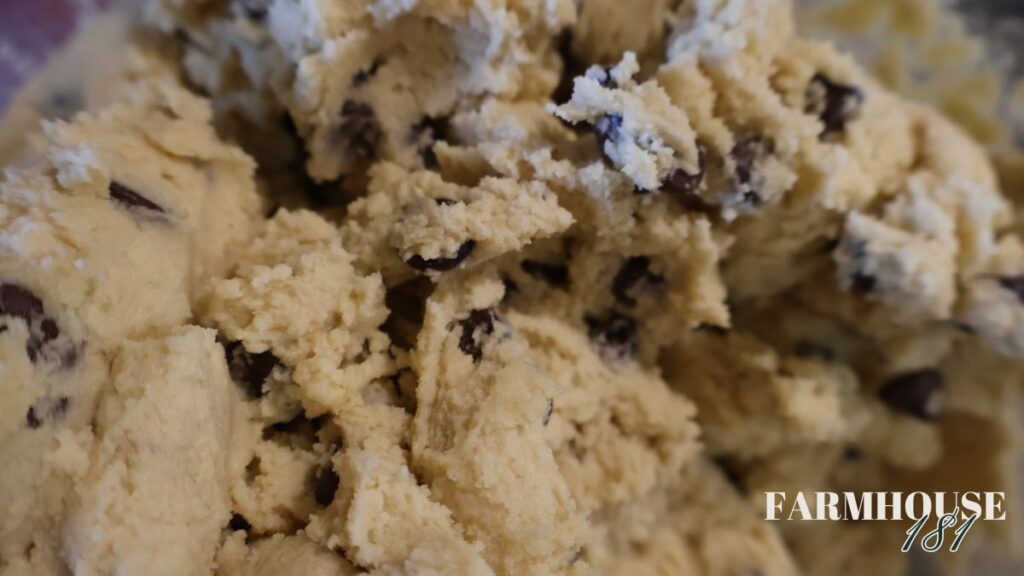
5. Fold in Chocolate Chips:
- Use a rubber spatula to fold in the semi-sweet chocolate chips evenly.
- For cookie dough lovers, mini chocolate chips can offer a more even chocolate distribution in every bite.
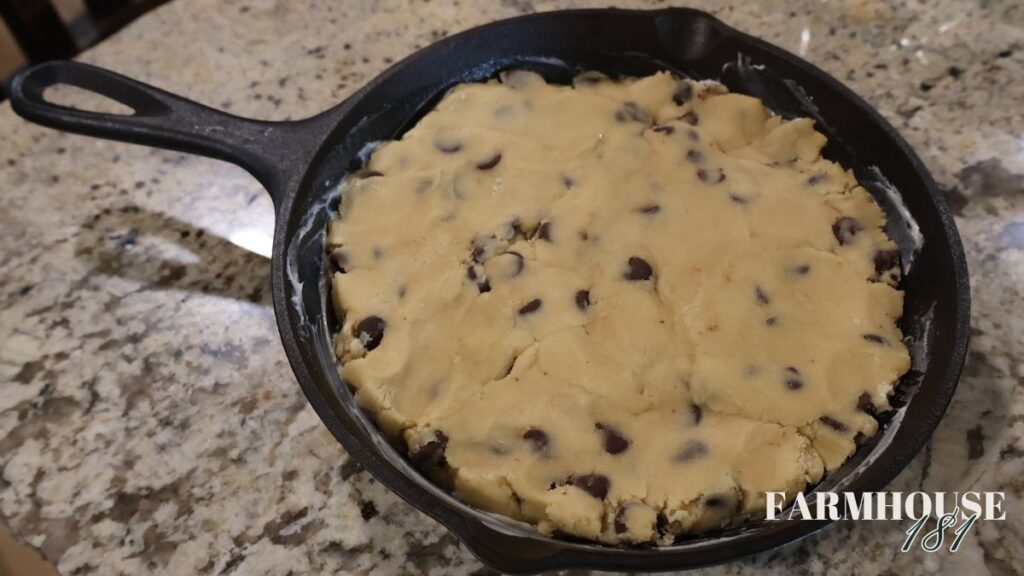
6. Fill the Skillet:
- Press about ⅔ of the cookie dough evenly into the greased skillet, making sure it’s about 1 inch thick.
- Keep any leftover dough stored in an airtight container in the fridge for up to a week or freeze for later (raw cookie dough doesn’t make it long around Farmhouse 181!).
7. Bake the Chocolate Chip Cookie Dough Cake:
- Bake for 30–40 minutes. The top of the cake should turn a light golden brown and not look wet.
- For a gooey center, lean toward the shorter bake time.
8. Let it Cool:
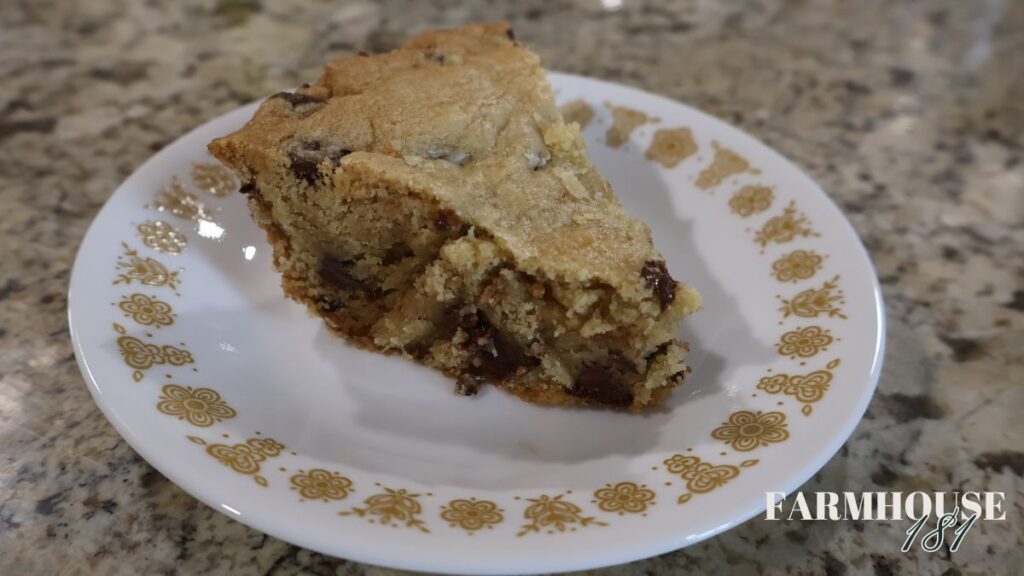
- Let the cookie dough cake cool in the skillet for about 10 minutes before slicing.
- If you want to decorate your chocolate chip cookie cake with icing, let the cake cool completely before frosting so the icing does not run.
9. Serve and Enjoy:
- Slice the chocolate chip cookie dough cake directly from the skillet and serve warm with a scoop of ice cream or a glass of cold whole milk!
Tips for Success
- Use Room Temperature Ingredients: Softened butter and room temperature eggs help the dough mix evenly.
- Avoid Overmixing: Mixing on low speed prevents a dense, tough texture.
- Cool Completely for Frosting: If you plan to add cookie dough buttercream or chocolate ganache, let the cake cool completely otherwise your icing will melt and run.
Storage Tips for Chocolate Chip Cookie Dough Cake
- Room Temperature: Cover the skillet with plastic wrap and store for up to 3 days.
- Fridge: Transfer to an airtight container and store for up to a week.
- Freezer: Wrap individual slices in plastic wrap and freeze for up to a month (use your own discretion here…we would have no problem going over a month).
Final Thoughts
This cast iron chocolate chip cookie dough cake is a tradition worth keeping. It’s simple, quick, and a guaranteed hit for any birthday or gathering. The combination of crispy edges and soft center, paired with the deep flavor of semi-sweet chocolate chips, makes this dessert hard to resist.
If you give this recipe a try, let me know in the comments or share a photo. And if you love chocolate chip cookies as much as we do, check out my Best Big Fat Chewy Chocolate Chip Cookie Recipe or Soft Sugar Cookies for Decorating for more inspiration. And if you need a frosting recipe to decorate your cookie cake click here!
Baking at home doesn’t have to be complicated. Sometimes, all you need is a cast iron skillet, a few simple ingredients, and the people you love gathered around the table.

Cast Iron Chocolate Chip Cookie Dough Cake Recipe
Equipment
- 8 inch Cast Iron Skillet
Ingredients
- 1⅓ cup Butter softened
- 1 cup Granulated Sugar
- 1 cup Brown Sugar
- 2 Eggs
- 2 tsp Vanilla Extract
- 3 cups All Purpose Flour
- 1 tsp Baking Soda
- 1 tsp Salt
- 12 oz Semi-Sweet Chocolate Chips
Instructions
- Preheat oven to 325 degrees.
- Cream together sugars and butter with a mixer.
- Add in eggs and vanilla and mix until combined.
- Mix dry ingredients of flour, salt, baking soda together.
- Add the dry ingredients to the wet ingredients and mix until a soft dough forms.
- Fold in or mix in the chocolate chips.
- Grease your cast iron skillet with butter.
- Press your mixed dough into your cast iron about 1 inch thick and all the way to the edges. My 8 inch cast iron uses about 2/3-3-4 of the dough in the recipe.
- Store any excess dough in the fridge and use within a few days, or put it in the freezer for longer keeping.
- Baking time is very dependent on the thickness of your cookie cake and size of cast iron. Bake anywhere from 30-40 minutes or until the top begins to turn a light golden brown and does not look doughy.
- Remove from the oven and let rest and cool. If you plan to put icing on your cake, wait until it has completely cooled first.
- Enjoy!
Leave a Reply